Tuesday, February 13, 2018
Maddie's Magnificent Movies!- Ice Cream Project
I'm animating my favorite food! YEET!
This project was one of the most complex, elaborate, and anticipated projects we have done in Maya thus far. There were two parts to it: modeling and animating. This was the first time that we animated something in Maya.
First, let me explain how I modeled this. For this project, there was a lot of joining shapes together and applying textures. However, unlike the previous projects, which had fairly basic textures, for this one we used bump mapping. Bump mapping allows your models to appear, well, bumpy, and makes things look more organic as opposed to the artificial smoothness of the lamberts, blinns, and phongs. I used a cloud texture for the ice cream scoops and a leather texture for the cone.
Now, time to explain how I animated this. Basically, I used a cylinder to create a rotating platform for the objects to sit on, and I linked all the objects together so animating it would be less of a hassle. Then I opened the animation timeline and added a keyframe at the beginning. After that, I rotated it, went to the end, and put a keyframe there. Automatically, the platform spun in the animation. Then it exported it as a series of pictures and I put it all together in AfterEffects.
I learned a lot about how to animate in Maya and how to use bump mapping. I am very excited to see what more we will do with this skill!
Wednesday, February 7, 2018
Maddie's Magnificent Movies!- Music Video Project (Party in the USA)
So, for Video Production, we had to make a music video. We got to choose our own groups,and me, my best friend, and some other kid were in high demand due to our artistic abilities. As a result, I
ended up with 3 people who were casual acquaintances of mine at best. I secretly wanted to do a
J-pop song, but I knew they would never go for it, so we settled on “Party in the USA” by Miley
Cyrus. I was tasked with drawing all the storyboards, which was exhausting work, but I managed to
do it and make it look good. There was also a day where we filmed, but I was not present for that.
However, I was present for the green-screen filming, and I even managed to dance in it. I essentially
learned how to make a music video. At one point, I did have an app called VideoStar that I used to
make music videos, but I wasn’t very good at it due to me recording everything with my phone.
However, this was my first experience with making a real music video with professional equipment. This was also my first experience with green-screens, a tool I will use in the future without a doubt. I had a lot of fun with this, and I’m looking forward to our next video project- a movie trailer!
Thursday, February 1, 2018
Final Maya Project- The Pen
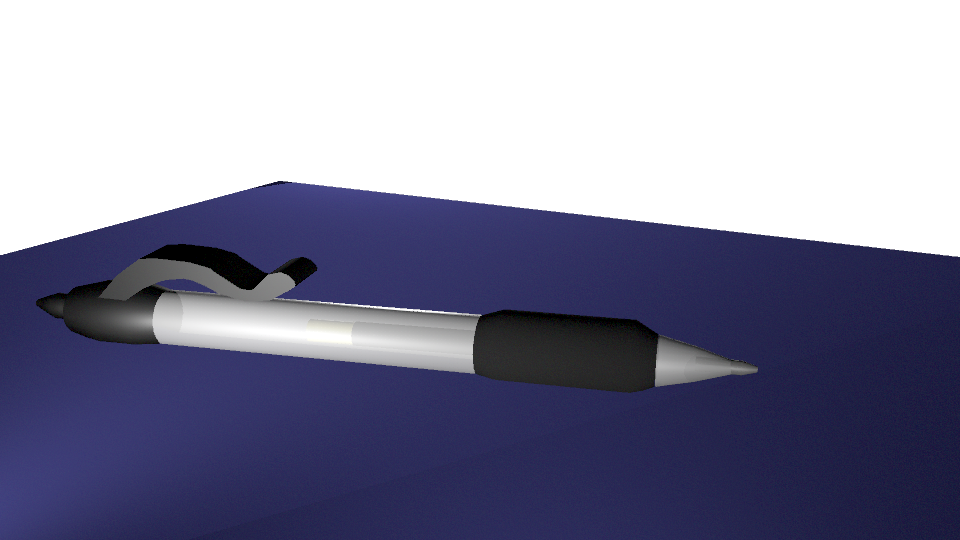
For our final project in Maya, we were asked to make a pen. However, the catch was that we needed to model it after an existing pen and make it as close to the original as possible. For reference, this was the pen I used:

This project was a very exhausting one, but it was quite simple once I got the hang of it. After all this time, I'm proud of how far I've come in Maya. I'm amazed with what I have been able to create in Maya recently, and though I prefer 2D animation, at least I know how to do 3D animation now.
Friday, January 19, 2018
Revolving and Lofting

This week, we were assigned to create two things in Maya: a cup and a salt shaker. How did we do this? Simple. Revolving and lofting. Now you might be wondering, "Maddie, what even is revolving and lofting, and what does it entail?" Well, allow me to explain.
Revolving is sort of like making something on a potter's wheel. You start with a simple NURBS curve, then you shape it into what looks like a cross-section of whatever you're going to make. Then you just click Revolve on the Modeling menu and spin it around an axis, and ta-da! You have your object.
Lofting is more akin to building a structure. You start with a NURBS surface and shape it into the base for whatever you are creating, then duplicate it and move the duplicates up until you have it at the height you want. You can also use NURBS surfaces that are differently shaped. Then, once you have the framework for whatever you are creating, you go to the Surfaces menu, click Loft, and voila! You have just successfully lofted.
Friday, January 12, 2018
Hammer Project

This week, we were assigned to make a hammer in Maya. Now, I'm not very good with Maya, and the many things that went wrong during this project is a prime example of that. However, it turned out pretty well despite that.
The first thing we had to do was model the hammer. It was easy at first, but once it got to shaping the claw, I encountered a problem- whenever I transformed something, I was doing it to the entire shape. Thankfully, after a quick Google search, I was able to fix it, and I continued onwards, shaping the head of the hammer as well as tapering in the handle.
Next, we had to shade the hammer. Shading was, by far, the easiest part. All I had to do was apply a brown lambert to the handle and apply a shiny metallic texture to the head.
Finally, we had to do 3-point lighting around the hammer. This was, by far, the most difficult part, because no matter what I did with my 3 spotlights, it would be too dark when it rendered. Finally, after hours of experimenting, I managed to use 3 extremely wide and bright lights to make the hammer visible, and after exporting it as a PNG, I turned up the contrast in the color settings on Preview. Overall, I think it turned out pretty good.
Friday, December 15, 2017
Animation Semester Reflection
Over the following semester, we have been creating several things. Today, we were asked to reflect on our favorites. Here are mine.
1. Walk Animation
In this project, I learned how to shade in Photoshop, and that moving the limbs of characters is a lot harder than one may think. You have to move the opposite arm and leg, alternating between them, and make sure the rhythm of the movement isn't off. I chose this project because I am so extremely proud of how Metal Girl looks. She's fully shaded, anatomically sound, and the metal blades on various parts of her body actually look like metal. Not to mention, this was the first video that I got to incorporate my characters into. I think the best part of this animation was how Metal Girl looks, but the worst part of it is the background, which looks quite out-of-place in comparison to the style of the character. I'm going to use this knowledge of how to make characters walk for my upcoming web series, Dank Meme Warriors. I will also use my new knowledge of how to shade in Photoshop for the official character portraits in my upcoming book series In My Element, among other things. If I were to change anything, I would most definitely use a different background and not just a screenshot from an NES game. In conclusion, I feel like this project showcased how beautiful I can make my characters look and how smoothly I can make them move.
2. Maya Castle

This was our second project using Maya, a 3D modeling software. I learned how to use booleans to make more complicated shapes and how to apply textures to objects. The only reason I chose this project is because we had to choose 2 Maya projects to reflect upon, and one of them is one that I am NOT proud of. I will use what I have learned to make appealing and detailed things in Maya for this class. The best thing about my castle is that it actually turned out decent. Throughout my project, I had no idea how to do a lot of the things due to my terrible memory, so I had to get others to help me on several occasions. However, my castle is a little basic. If there was anything I would change, it would be adding more things to make it stand out. In conclusion, this castle was very difficult, but I am so proud of it.
3. Polything

Going from one Maya project to another, the Polything was our first attempt at using lighting. I learned how to use lighting in Maya, for the most part. I also had some more practice with booleans and making complex shapes. I chose this project because it's the Maya project I'm most proud of. It's so beautiful! I will use what I have learned to make equally beautiful things in Maya. I believe that while I could work on the lighting, the shape and the way the light shines off of it are spectacular. If I could change anything, I'd make the light a little brighter. In conclusion, this is the best thing I've made in Maya thus far.
4. Multiplane Animation
This animation, which I have dubbed "Moonscape" was not only a project that I learned a lot from, but also an opportunity to sneak in references to astronomy, mythology, and pop culture. I learned what a multiplane animation entails, and that the things in the back must be shorter and move slower than the things in the front. I chose this project because I'm proud of not only how it moves, but all the things I was able to sneak in there. The best thing about this animation is the smooth animation, but I do think it could have been shaded more. Again, I will use this skill when making multiplane animations for my upcoming web series Dank Meme Warriors. If I would change anything, I'd take some time to shade everything. Overall, this animation is truly "out of this world".
5. Story Animation
Finally we come to my In My Element Story Animation, which I consider to be my magnum opus. I learned not only how to put audio into an AfterEffects animation, but also how to use the various skills I have learned to create something beautiful. I chose this project because it is the greatest thing I have created in this class- beautiful, quirky, lighthearted, smooth, heartwarming, and educational. The best things about this animation are the character designs and the voice work. However, there were a few slip-ups, such as the beginning when Argentia's mouth movements didn't match up to her lips and when Courtney had to have her mouth covering up a clear spot at all times even when she was talking. If I was to change anything, it would be those slip-ups. I will use everything I have learned here not only for my class, but for my own independent projects. In conclusion, this is the gold standard of my animations, that will lead the way for sodium many good animations. It may be a little silicon, and it could be ironed out a little, but as it is, it shows that for me, animations are serious bismuth.
Thanks for reading this, everyone. See you in 2018!
-Madeline
Wednesday, December 13, 2017
ONW Now- Sophomore Edition
For our final video project of 2017, we were asked to create an ONW Now news segment with other kids in our class. I was one of the two news anchors, the other one being my best friend. I also was asked to do a story about the underclassman play.
The story about the underclassman play wasn't all mine- my best friend helped out. I gave her questions to ask the director as well as information about the underclassman play, and I also helped her get B-roll. At first, I thought that the day she got B-roll would be a day where everyone came, however, I read the schedule wrong, and I wasn't needed that day. I came anyway to see if my friend would get her B-roll, but later she said that I should "go home, do something productive, and pet a dog". So I went home. Later on, I acquired more responsibilities as the anchor.
I learned, for the most part, what being a news anchor entails. It's harder than it looks- you have to smile and speak clearly all while stating the information and looking respectable. I also learned that getting B-roll of a play is easier said than done, especially when you're using the Cursed Tripod.
Next time, I should give myself more work to do, as I believed I didn't have enough to do in this project. Nevertheless, I enjoyed this project and can't wait for Entertainment next semester!
Subscribe to:
Posts (Atom)